Switching up vape juice flavors can add excitement and intrigue to the vaping experience, creating new tastes and sensations. But for best results without residue build-up between flavors your tank must be properly cleansed. How to Clean Vape Tank for New Flavor? In this guide, we will cover each step for effectively cleansing it so it is ready for its new adventure.
Buy Now: Crave Vape
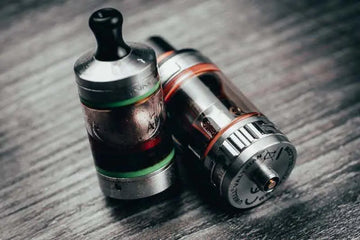
Step 1: Disassembly
To start disassembling your vape tank, first disconnect it from its mod. Remove and completely disassemble its components--drip tip, glass tube, coils and bases -before placing back together again on its base.
Step Two: Discard Remaining E-Liquid
Pour out any remaining e-liquid from your tank. Be sure to dispose of it correctly according to local regulations, and avoid mixing different flavors as this can compromise its taste.
Step 3: Rinse With Warm Water
Rinse all tank components thoroughly under warm running water in order to remove any leftover e-liquid, debris or buildup on tank surfaces. Focus on making sure both coil and interior tank components remain clear of residue build-up.
Step 4: Cleaning Solution
Create your cleaning solution by mixing warm water with mild dish soap or vape cleaning solutions (or isopropyl alcohol for more thorough clean). Submerge tank components for approximately 10-15 minutes in this cleaning solution before submerging again into warm water to rinse away contaminants and debris.
Step 5: Scrubbing
Once your tank has been submerged in water, use a soft bristled brush or toothbrush with soft bristles to gently scrub its components; this includes hard-to-reach areas like coil housings and threadings. Be mindful not to damage delicate components during this step!
Check Out: Crave Max
Step 6: Rinse and Dry
Once the components of your tank have been thoroughly scrubbed, rinse them under warm water once more to rinse away any soap residue or cleaning solution that remains. Shake off excess liquid then pat each component dry using either paper towels or clean cloths - allow all parts to air dry completely before assembling your tank back together again.
Step 7: Reassembling and Priming
To reassemble and prime your tank, check all components are correctly aligned and securely fastened together. Install any necessary coil replacements; additionally prime by adding drops of new e-liquid onto its wicking material before filling your new e-liquid for optimal flavor production and to avoid dry hits.
Step 8: Fill and Enjoy
Once your vape tank has been cleaned and primed, it is time to fill it with your desired flavor of e-liquid. Take several primer puffs until all coils have been saturated before making adjustments as necessary based on either temperature settings or wattage requirements. Finally, sit back, relax, and savor a truly flavorful experience provided by a sparkling clean vape tank!
Explore Now: How to ghost
Conclusion:
How to Clean Vape Tank for New Flavor? Proper maintenance of your vape tank is vital to enjoying an outstanding vaping experience, preserving flavor purity, and increasing enjoyment overall. By following these simple steps, you can guarantee every flavor is as vibrant and delectable as intended - next time you explore a new flavor don't forget to give your tank a thorough cleaning for a rewarding vaping session!